In this guide you will discover how to connect the segments created on Rfmcube with the Email Marketing Mailchimp platform easily.
By connecting them you can start your targeted campaigns immediately without having to deal with the integration between Mailchimp and your sales data.
Generate the API key
First, open your Mailchimp account and follow the instruction: Profile >> Extras >> API keys.
Click on Create a Key which will automatically generate your key, then select it and copy to the clipboard.
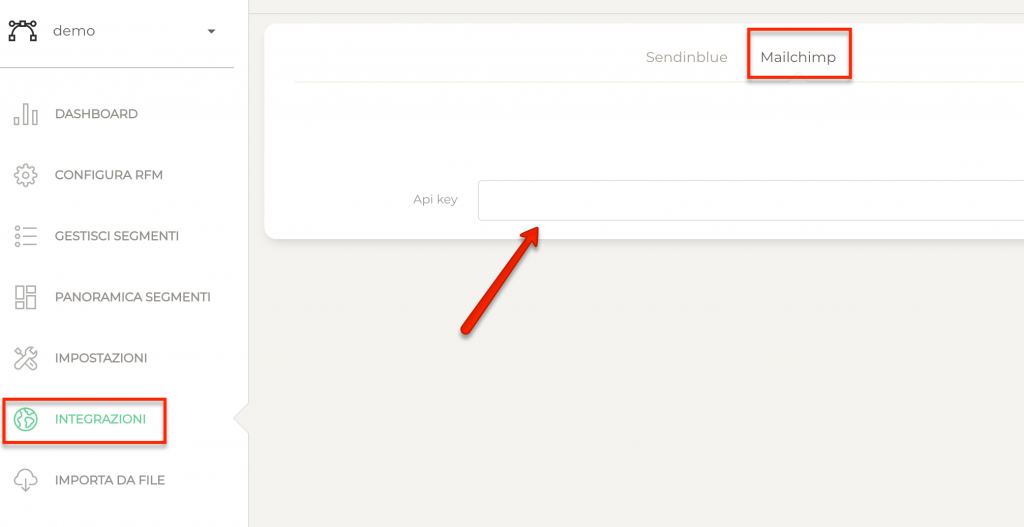
Now log into your Rfmcube account and go to the Integrations item. Paste the previously created key in the API key box, then click Save.
Field mapping
At this point, if the inserted key is correct you will see an open field in which you will have to select the Mailchimp audience you want to synchronize with Rfmcube (it is only possible to synchronize the RFM segments of a connector with an audience).
Now choose Rfmcube fields you will map on Mailchimp. Each field you select will generate an additional column visible in Mailchimp’s customer database. Having done this, you will be able to use the selected values to segment your customers as you wish.
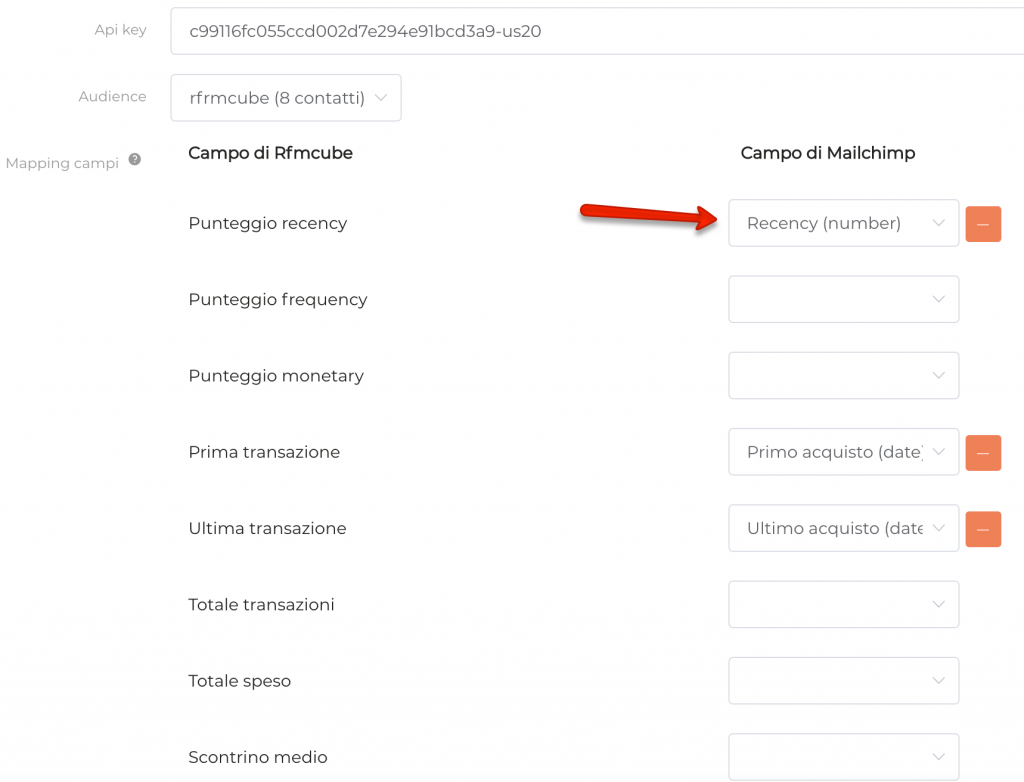
If a specific field on Mailchimp does not correspond to the fields of Rfmcube, you can automatically create it by clicking on the button New contact attribute.
You will have to specify the type of field (text, number or date), choose a field name and a tag name. After that click on Save.
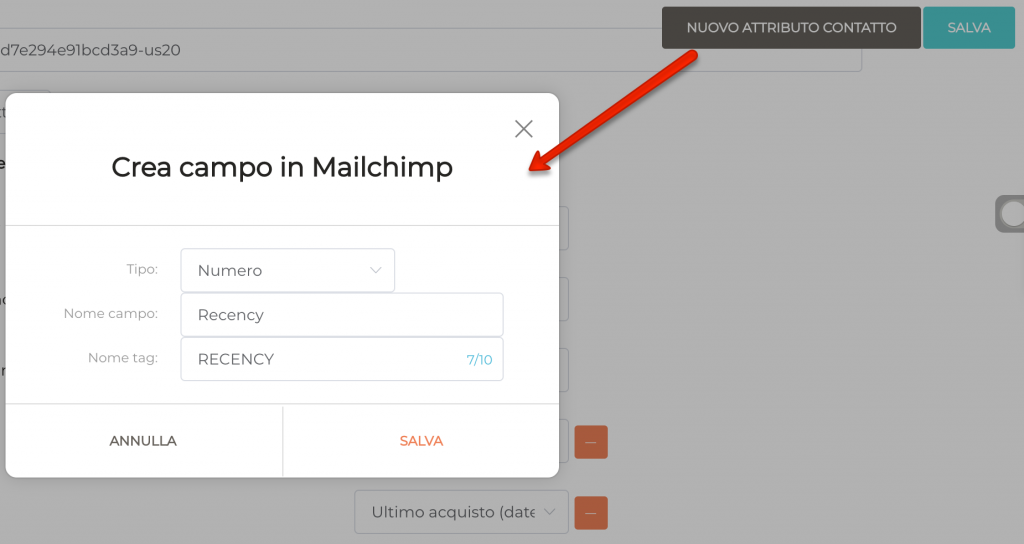
If you now go back to Mailchimp, you will see the newly created fields and tags appear.
Assign a tag to each segment
Now that both your softwares are protected, go to Rfmcube in the item Segments overview and choose the customer lists you want to synchronize with Mailchimp.
Choose a saved segment and click on the Mailchimp button on the right:

After the popup has opened, select the tag you want to assign to users in the segment by selecting it from the drop-down menu, or create a new tag.
We recommend that you assign the name of the corresponding list to tags on Rfmcube, so that you can easily track them on Mailchimp.
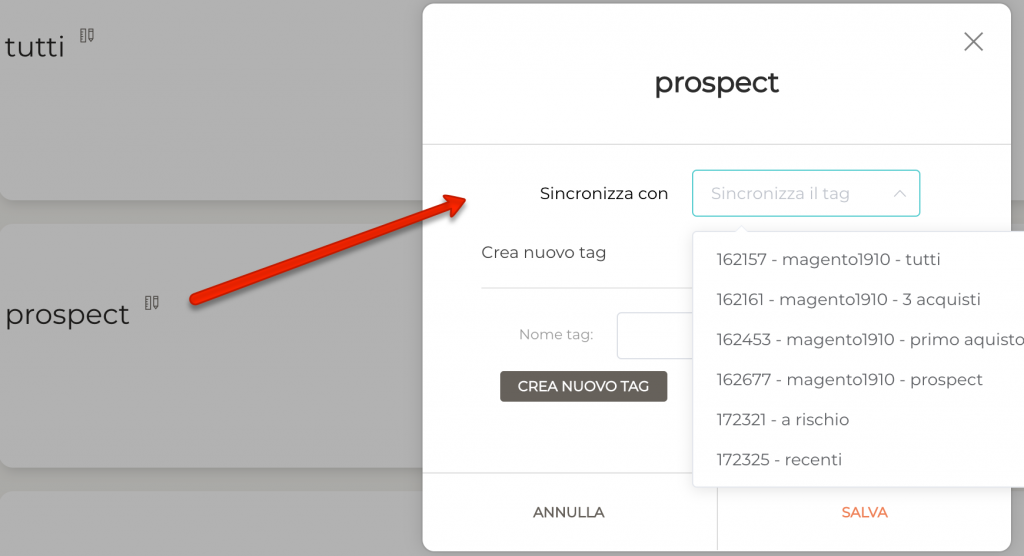
Once this is done, click on Synchronize Now, then on Save.
Congratulations! You have just synchronized your first segment and you can proceed to create your first marketing automation campaign.
If the contacts are already present on Mailchimp, they will be updated throughout the day with the assignment of the corresponding tag to each.
If the contacts are otherwise new in Mailchimp, you can decide to assign them the subscription status, i.e.: Subscribed, Pending or Unsubscribed.
Pay attention: if you decide to assign Pending status to new contacts, Mailchimp will automatically send them an email confirming their registration.
Nb: only the contacts in the segments you decide to synchronize will be imported. Rfmcube does not import all the customers of your Ecommerce by default to avoid the risk of automatically increasing the cost of your monthly subscription of Mailchimp!
