In this guide we’ll show you how to integrate your Shopify store with Rfmcube, in order to import your customer history in a few simple steps.
The operation is very simple and you can do it independently, without any need for a programmer.
Let’s start!
Create an app in Shopify
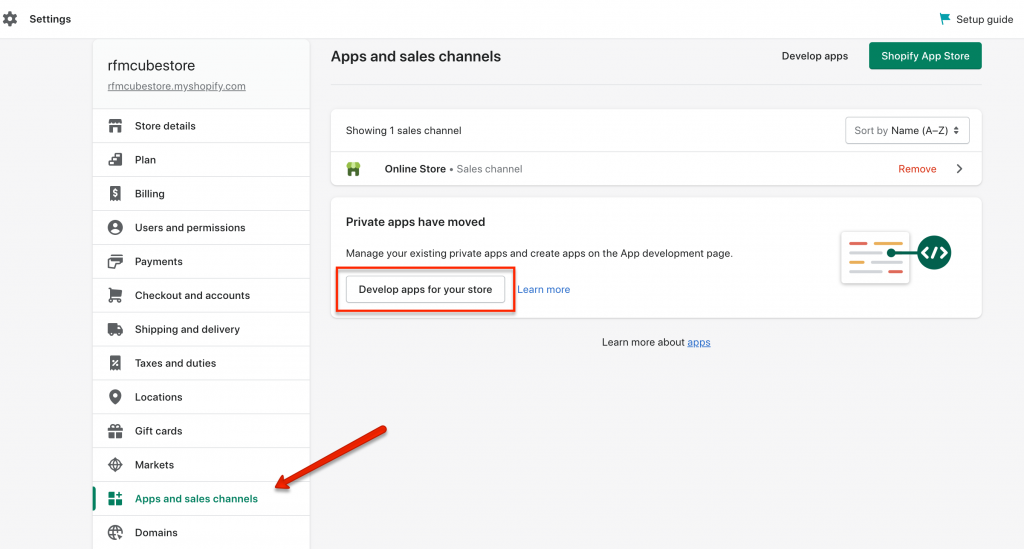
1. From your Shopify dashboard follow the path Settings –> Apps and sales channels –> Develop apps
2. Give your App a name (for example “Rfmcube app”) then click on Create app button.
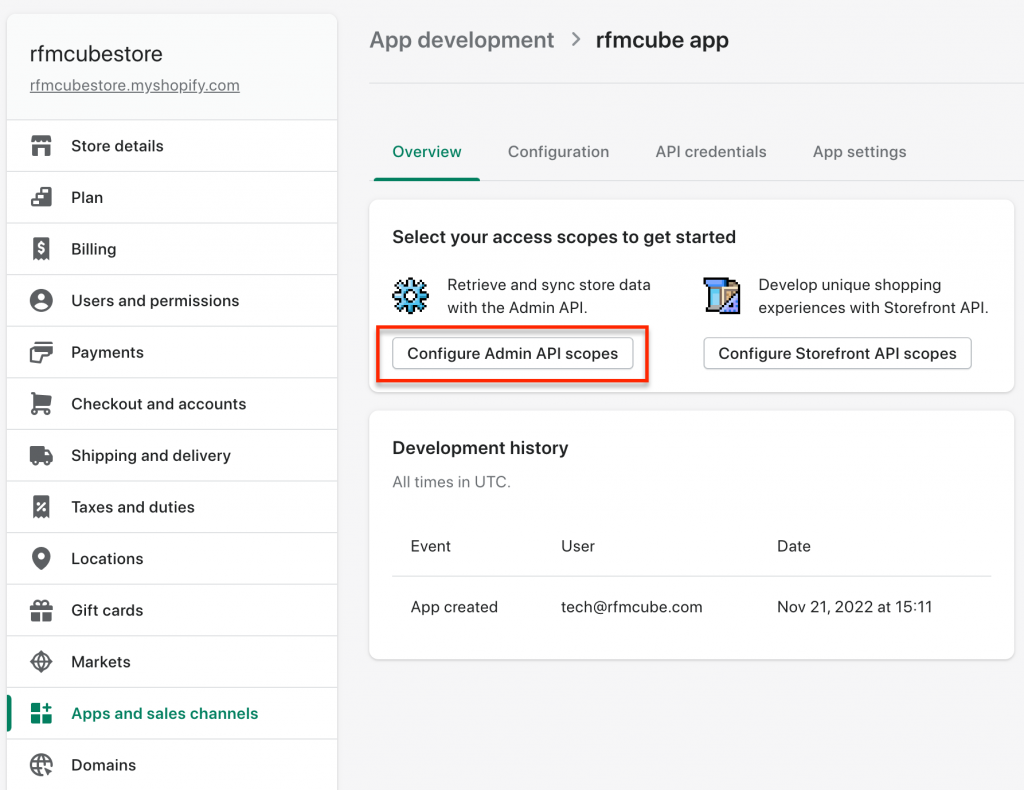
3. Now go to Overview –> Configure Admin API scopes
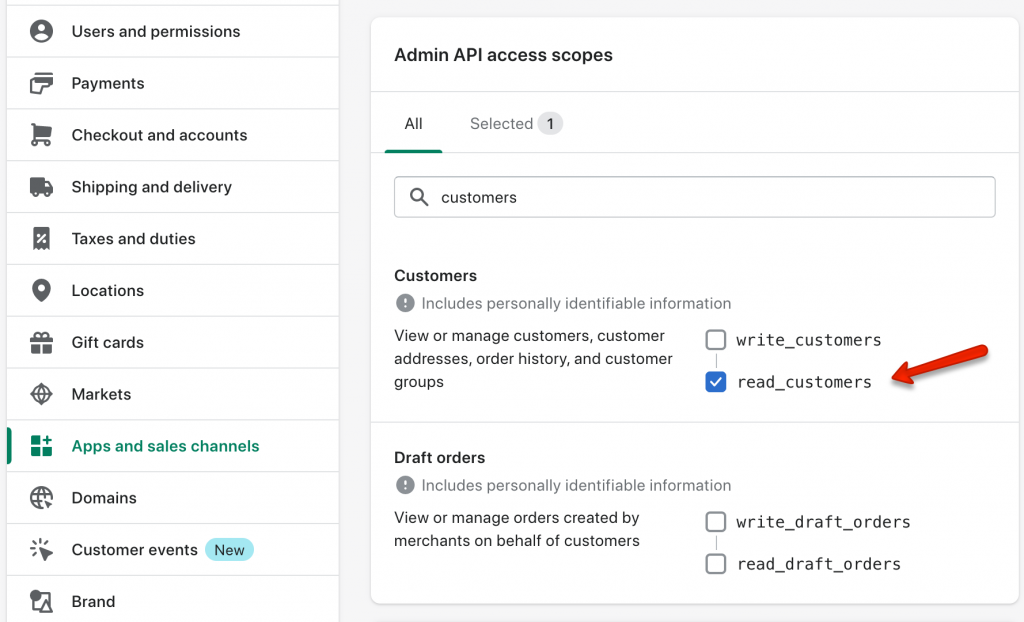
4. Check read-only access at least on Customers (read_customers), Products (read_products) and Orders (read_orders) tables.
We advise you to also give access to the other areas, to expand the range of additional data that can be imported into Rfmcube.
5. Scroll down to Webhook subscriptions and copy-paste the event version into a clipboard, then click on Save.
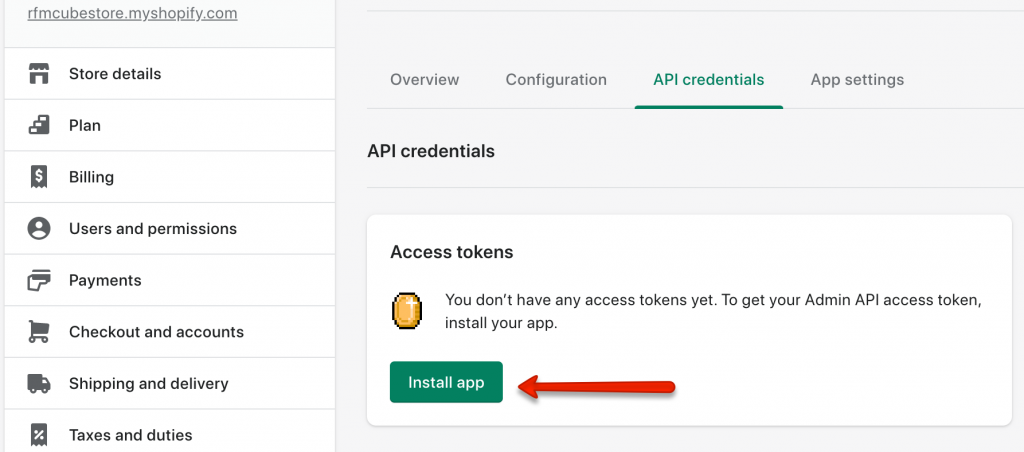
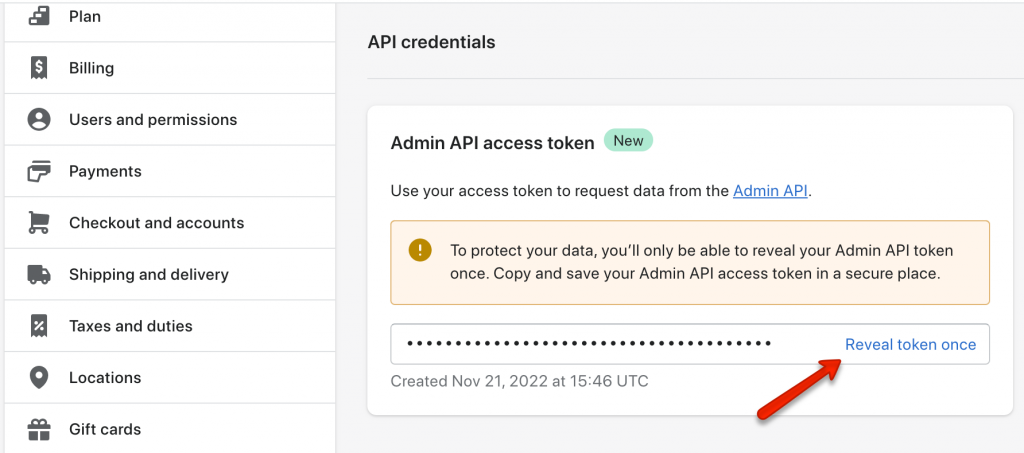
6. Go to API credentials and click on Install app.
7. Click on Reveal token once and copy the numerical value you will need to start the integration on Rfmcube.
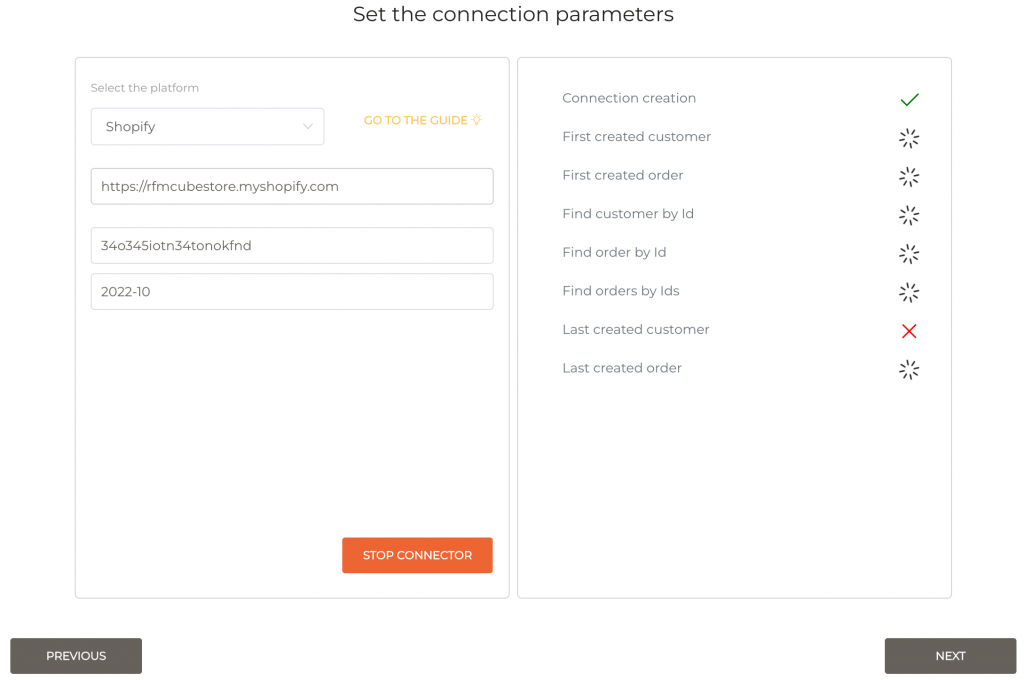
8. Well done! Now you have everything you need to integrate your Shopify store with Rfmcube and start importing your sales history. Move to https://app.rfmcube.com/create and enter the values:
- url: the web address of the store, e.g. https://store_name@shopify.com
- Access Token: the one created in step 7
- API Version: the webhook version found in step 5
9. Click on Try Connector to test the API connection.
If all the tests on the right are successful, the integration is successful! Click on the Next button to start importing your data.
Depending on the size of your customer history, it could take from 30 minutes to 12 hours, after which you will receive an email notification with access to your new dashboard!

